AirSprayTech.com Academy — Finish Defect Diagnostic Center
Mottling and Clouding in Coatings: Causes, Diagnosis, Correction & Prevention
When Metallic Color Turns Patchy
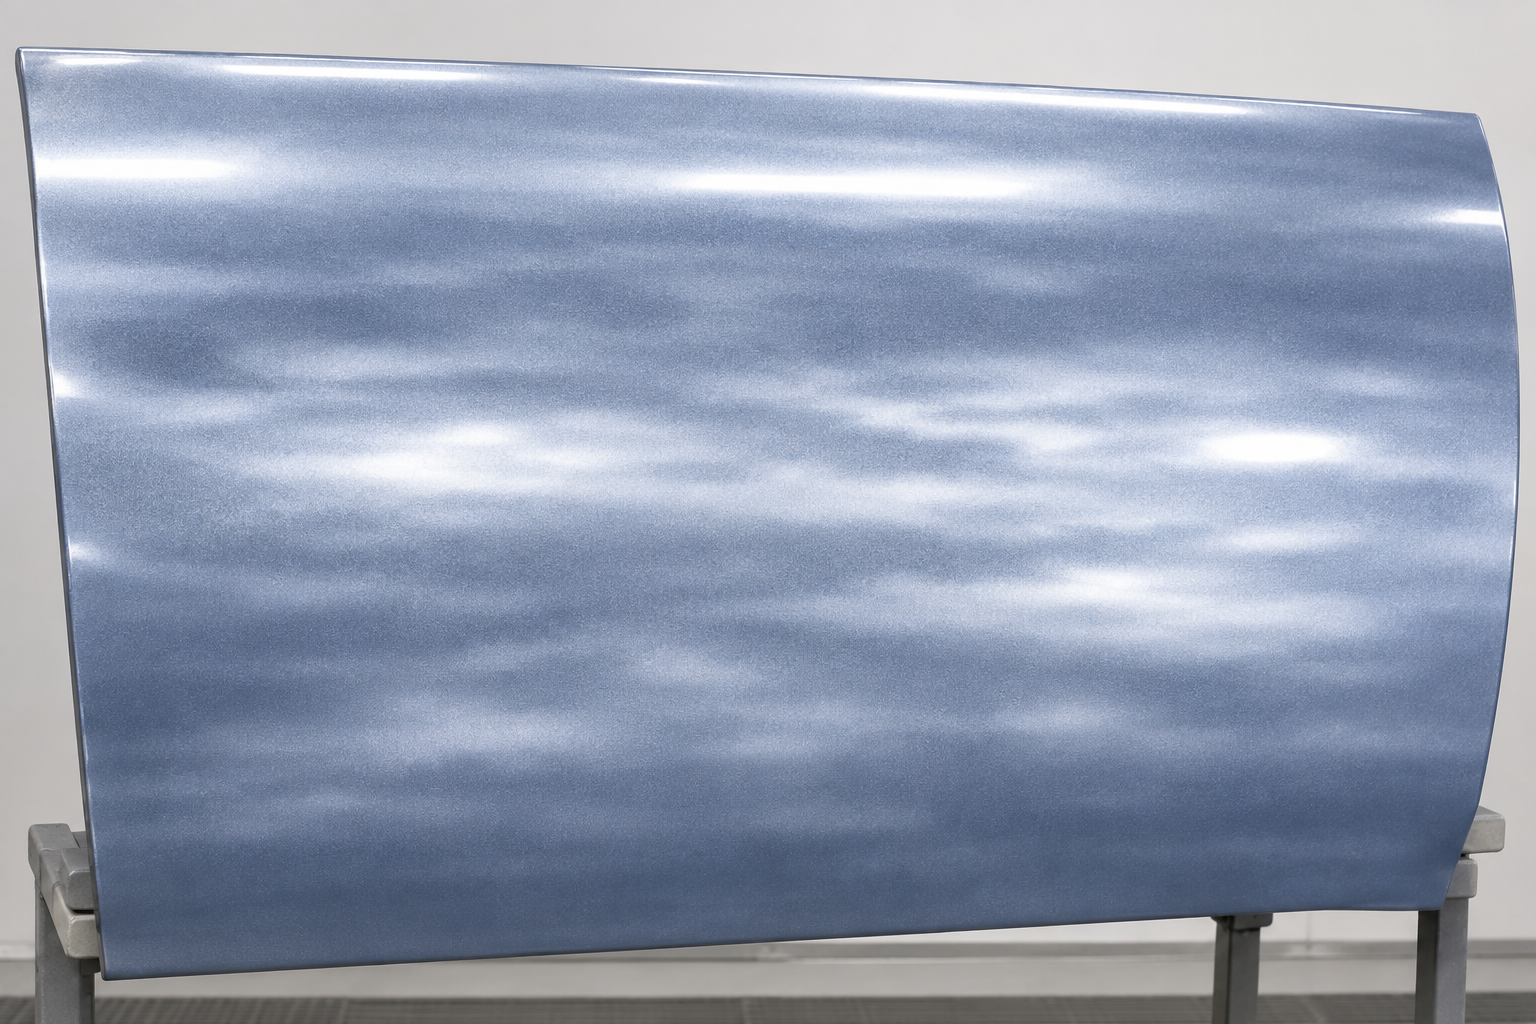
Mottling—often called clouding—is an irregular light-and-dark appearance in a metallic, pearlescent, or other effect finish. The film may be smooth and glossy, yet the color looks patchy, striped, blotchy, or cloudy when viewed under suitable light or from different angles. The visual change is usually caused by uneven distribution or orientation of effect pigments rather than a physical texture in the coating surface.
What Mottling Looks Like
- Irregular light and dark patches across an otherwise continuous finish.
- Bands, clouds, or streaks that may follow the direction of the spray passes.
- A blotchy appearance that becomes stronger under directional light or at an oblique viewing angle.
- Uneven metallic “flop”—the apparent color or brightness changes inconsistently as the observer moves.
- A defect that may be difficult to see in the booth but obvious outdoors, under inspection lighting, or after clearcoat.
Mottling is most commonly associated with metallic and pearlescent liquid coatings, including automotive refinish and industrial effect finishes. Solid colors do not contain metallic flakes, so patchiness in a solid color is more likely to be coverage, color, contamination, film-build, or gloss variation. Effect powder coatings can also display inconsistent appearance, although their application variables and correction procedures differ from those of liquid basecoat.
Do Not Confuse Mottling with These Conditions
| Condition | Typical Clue | What to Check |
|---|---|---|
| Mottling or clouding | Light/dark clouds or streaks; effect changes with viewing angle. | Metallic orientation, spray pattern, wetness, overlap, reducer, flash time, and agitation. |
| Poor coverage or hiding | Substrate or sealer color influences the finish, often at edges and thin areas. | Film build, number of coats, ground-coat color, and coverage under consistent light. |
| Color mismatch | The entire repair or part is consistently too light, dark, warm, or cool. | Formula, variant, batch, mixing accuracy, application panel, and approved standard. |
| Poor or uneven gloss | Reflected images lack clarity or gloss readings vary; color may not change with angle like a metallic effect. | Cure, film thickness, atomization, solvent balance, temperature, and contamination. |
| Dry spray | Rough, sandy, or grainy surface with low gloss. | Gun distance, airflow, reducer speed, atomization, overspray, and booth temperature. |
| Contamination | Localized spots, craters, smears, or residue rather than a repeating spray-pass pattern. | Cleaning materials, compressed air, silicone, oil, water, and handling. |
Common Causes
Material and Mixing
- Metallic or effect pigment settles before or during application.
- Material is not mixed or agitated as directed.
- Incorrect reducer, reducer speed, viscosity, mix ratio, or induction time.
- Material is used outside its stated pot life or temperature range.
- Incompatible components, unapproved additives, or uncontrolled batch differences.
Spray Equipment
- Distorted or uneven spray pattern from a dirty, damaged, or mismatched air cap, nozzle, or tip.
- Fluid delivery and atomizing air are not balanced.
- Pressure changes during the job or the gun cannot support a consistent pattern.
- Electrostatic settings, grounding, or part geometry create uneven deposition.
Application Technique
- Inconsistent gun distance, angle, travel speed, or overlap.
- Arcing the gun instead of keeping it perpendicular to the surface.
- Basecoat is applied too wet, causing effect pigment to move or settle unevenly.
- Uneven flash time, poor wet-edge control, or an incorrect orientation/drop coat.
- Attempting to “spot in” a visible patch without blending the effect consistently.
Environment and Substrate
- Part, coating, or booth temperature is outside the product data sheet range.
- Excessive or unbalanced airflow accelerates evaporation on part of the work.
- Humidity or temperature changes alter evaporation and film wetness.
- Uneven sealer color, sanding, absorption, or underlying film build influences appearance.
A Practical Diagnostic Sequence
- Map the defect. Inspect the full part under controlled, diffuse lighting and directional lighting. View it straight on and at several angles. Note whether the pattern follows spray passes, part geometry, airflow, or repaired areas.
- Verify the material. Confirm the product, color variant, batch, mix ratio, reducer, viscosity, pot life, and required agitation against the current technical data sheet.
- Check pigment suspension. Examine the cup, pressure pot, circulating system, or hopper for settling or separation. Restore only the agitation recommended by the coating supplier.
- Test the spray pattern. Use the coating or an approved test material to confirm a clean, centered, uniformly atomized pattern. Inspect the air cap, nozzle, needle, filters, hoses, regulators, and fluid supply.
- Review technique. Observe gun distance, perpendicularity, speed, overlap, triggering, wet-edge control, flash time, and any required control or orientation coat.
- Check process conditions. Record material, substrate, and air temperature; humidity; booth airflow; pressure; fluid delivery; and actual flash times.
- Spray a test panel. Reproduce the complete system on a properly prepared panel before correcting the production part. Compare it with an approved color standard under agreed lighting.
How to Correct the Defect
Before clearcoat: Stop and consult the coating manufacturer’s technical data sheet. Some basecoat systems permit a properly flashed control or orientation coat; others require additional basecoat applied by a specific procedure. Correct the equipment, material, or technique first. Adding more material without fixing the cause can intensify the mottling or create solvent and film-build problems.
After clearcoat: Do not expect clearcoat to hide uneven metallic orientation. If the defect remains objectionable after the system has cured, the usual remedy is to sand and refinish the affected area in accordance with the coating manufacturer’s repair procedure. The exact sanding depth, recoat window, basecoat application, blending method, and clearcoat boundary depend on the approved coating system.
Prevention on the Job
- Use the specified sealer or ground-coat color and achieve uniform coverage before applying the effect coat.
- Mix accurately and maintain the recommended agitation without over-agitating the product.
- Select the approved reducer or thinner for the product, temperature, part size, and booth conditions.
- Keep the spray gun clean and use the manufacturer-recommended air cap, tip, nozzle, pressure, and fluid delivery.
- Hold a consistent distance and a perpendicular gun angle; maintain uniform travel speed and overlap.
- Observe specified flash times and use the prescribed orientation or control-coat technique when required.
- Control booth airflow, temperature, humidity, and part temperature, and record them for repeatability.
- Use a test panel when changing colors, formulas, equipment, operators, reducers, or environmental conditions.
Electrostatic and Powder-Coating Considerations
With electrostatic liquid application, poor grounding, excessive or insufficient voltage/current, changes in gun-to-part distance, and Faraday-cage areas may alter deposition and effect-pigment orientation. Verify the entire ground path and follow both the gun manufacturer’s settings and the coating supplier’s instructions.
Metallic and special-effect powders may vary in appearance when charging, application thickness, reclaim ratio, powder condition, gun settings, or part geometry changes. Bonded and non-bonded metallic powders can behave differently. Do not apply a liquid-coating correction procedure to powder. Use the powder supplier’s application and reclaim limits, keep film thickness controlled, and approve a representative production sample before the full run.
Inspection and Documentation
Evaluate the finish against an approved standard under agreed lighting, viewing angles, and distance. Record the part location, color and batch, coating system, equipment setup, process conditions, film thickness where applicable, and photographs from repeatable angles. ASTM D1729 provides a practice for visual appraisal of colors and color differences under diffuse illumination. ASTM E1164 addresses obtaining spectrometric data for object-color evaluation. These practices support controlled evaluation; they do not by themselves establish an acceptable amount of mottling. Acceptance criteria must come from the specification, approved sample, customer agreement, or coating manufacturer.
For directional metallic and pearlescent finishes, a single color reading may not describe the full appearance. When required by the specification, use the stated multi-angle instrument and method and compare the result with the approved standard.
Technical References
- PPG Refinish: Mottling—description, causes, prevention, and correction
- Axalta Standox: Paint Defects—analysis and correction guide
- ASTM D1729: Visual Appraisal of Colors and Color Differences
- ASTM E1164: Obtaining Spectrometric Data for Object-Color Evaluation
Technical notice: This article is general educational guidance. Always follow the current coating technical data sheet, safety data sheet, equipment instructions, governing specification, and applicable workplace requirements. Confirm repairs on a test panel when practical.
© 2026 Azimuth Spray Systems, LLC. AirSprayTech.com — The Finishing Authority®. All rights reserved.