AirSprayTech.com Academy — Finish Defect Diagnostic Center
When the Surface Splits: Diagnosing Checking and Cracking
A fine line in a coating can be an early warning or evidence that the entire system has lost the ability to move, cure, and age as designed. The depth, direction, spacing, and location of the breaks reveal far more than the word “cracked.”
What Checking and Cracking Look Like
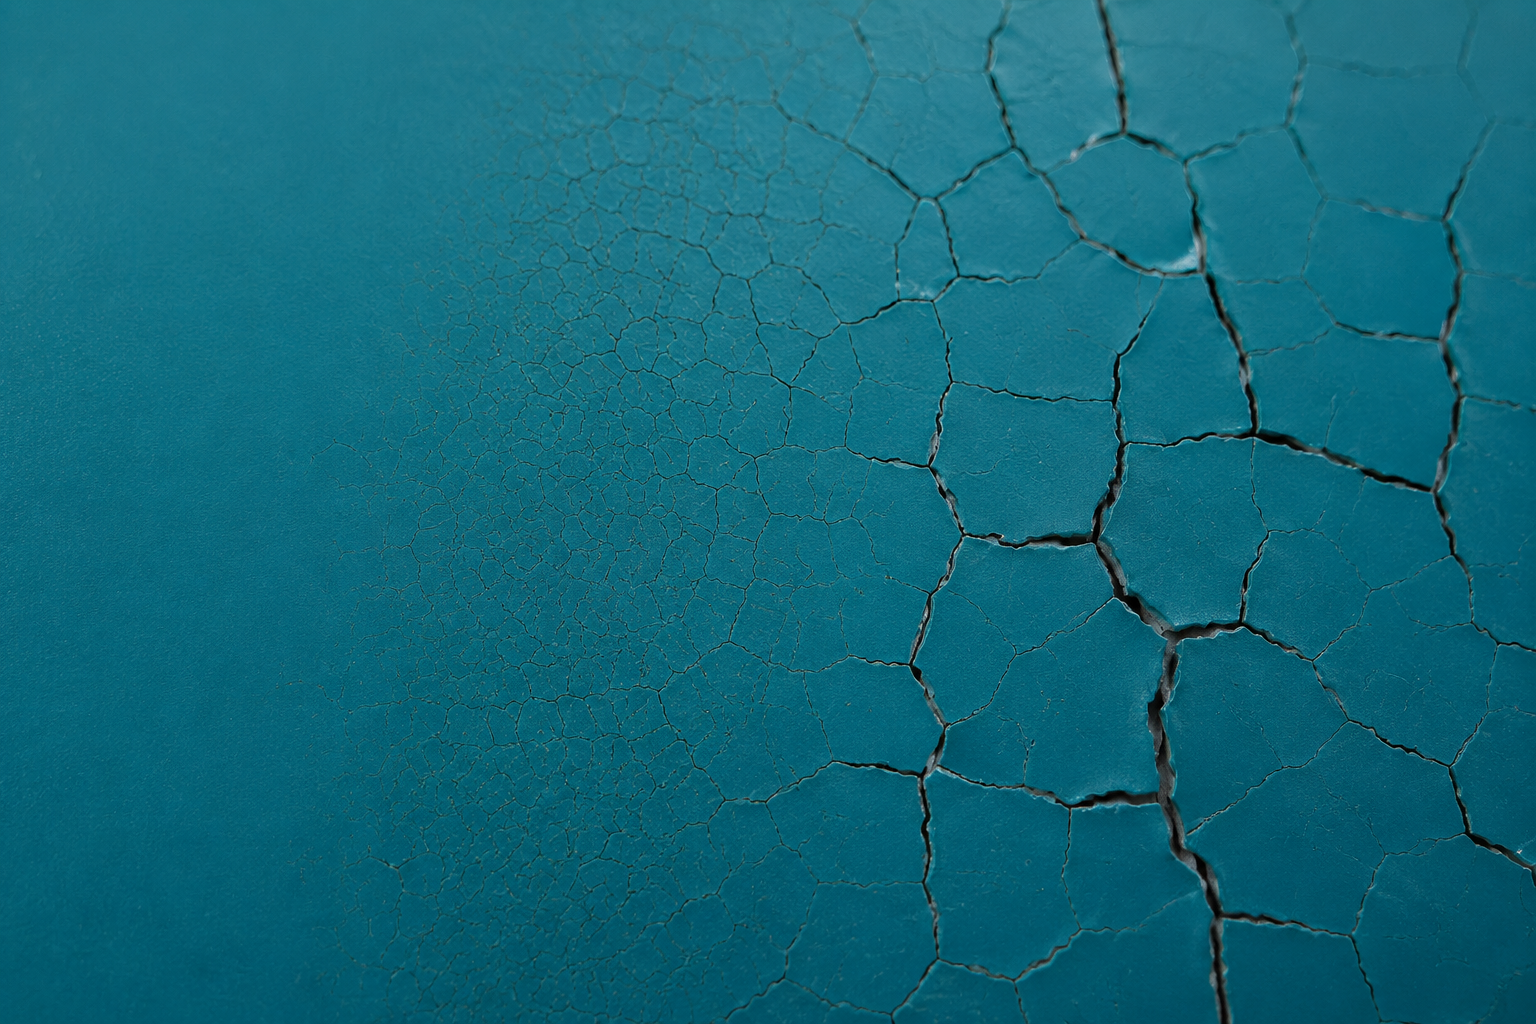
Checking often appears as a dense network of hairline breaks visible under angled light or magnification. The lines may form small irregular polygons, run mostly parallel, or follow the grain and movement of the substrate. Early checking may affect gloss before it is obvious from normal viewing distance.
Cracks are wider, deeper, and easier to see. Their edges may open, curl, or expose an underlying coat or substrate. Cracking may be isolated around joints, corners, welds, fasteners, repairs, and thick areas, or it may cover the entire surface. Record whether the break remains in the topcoat or travels through the whole system; this distinction changes both the diagnosis and the repair.
Why Coatings Check and Crack
Aging and Loss of Flexibility
- Ultraviolet exposure, oxidation, heat, chemicals, weathering, or plasticizer loss makes the film brittle.
- Repeated hot-cold or wet-dry cycles expand and contract the coating and substrate at different rates.
- An aged coating can no longer accommodate ordinary movement, vibration, or impact.
- Maintenance coats add stress to an already weakened system.
Application and Cure
- Excessive film thickness creates shrinkage and internal stress.
- Incorrect mix ratio, incomplete mixing, improper induction, or unsuitable thinner changes cure and flexibility.
- Forced drying, excessive heat, poor flash, or recoating too soon traps solvent or causes uneven cure.
- Application outside temperature, humidity, dew-point, or recoat limits weakens the film.
Compatibility and Layer Design
- A hard, rigid topcoat is applied over a soft, flexible, uncured, or thermoplastic layer.
- Solvent attack, incompatible chemistry, or an unsuitable recoat activates or weakens the old finish.
- Too many old layers create a thick system with different rates of movement and cure.
- The specified coating lacks flexibility for the substrate or service environment.
Substrate Movement and Stress
- Wood grain, concrete cracks, joints, seams, welds, fasteners, flexible panels, and dissimilar materials move beneath the film.
- Impact, vibration, forming, bending, abrasion, or structural movement exceeds coating elongation.
- Sharp edges and abrupt thickness changes concentrate stress.
- Corrosion, moisture, freeze-thaw action, or substrate deterioration opens cracks from below.
Let the Crack Pattern Guide the Investigation
| Observed Pattern | Likely Direction | What to Verify |
|---|---|---|
| Fine, shallow network limited to the surface | Early checking from aging, UV exposure, oxidation, or surface cure stress | Exposure history, coating age, gloss loss, flexibility, and depth under magnification |
| Wide polygonal cracks in a heavy film | Excessive build, rapid surface drying, shrinkage, or mud cracking | Wet and dry film thickness, application passes, thinner, flash, airflow, and cure temperature |
| Parallel cracks following wood grain, forming lines, or panel flex | Substrate movement transferred into a coating that cannot stretch | Moisture cycling, joints, flexibility, part forming, vibration, and substrate condition |
| Cracks centered at corners, welds, fasteners, seams, or repairs | Localized stress, excessive edge build, movement, or repair incompatibility | Geometry, detailing, featheredge, filler, sealant, stripe coat, and local thickness |
| Topcoat cracks while primer remains unbroken | Topcoat brittleness, incompatibility, excess topcoat thickness, or cure problem | Layer-specific DFT, recoat window, product compatibility, mix, cure, and exposure |
| Break extends through every layer to the substrate | System-wide embrittlement, major stress, substrate movement, or crack reflection | Cross-section, system age, total thickness, substrate crack, corrosion, and service loads |
Checking and Cracking Versus Similar Defects
- Mud cracking: usually develops during drying when a coating is applied too heavily or dries too rapidly. It forms pronounced irregular polygons and is a specific cracking mechanism.
- Wrinkling: the surface puckers or folds over softer material; true cracks are openings or fractures in the film.
- Lifting: a new coat softens and disturbs an underlying film, often producing raised, curled, or wrinkled areas rather than simple age-related fissures.
- Crazing: commonly describes a very fine, dense network of surface cracks. Terminology varies among industries, so describe depth and pattern in addition to naming it.
- Flaking and scaling: pieces have detached. Checked or cracked coating may still be attached, although it can later become flaking.
- Peeling and delamination: the primary failure is separation at an interface. Cracks can provide the starting edges for later peeling.
- Substrate cracking: a concrete, wood, composite, filler, or weld defect may reflect through an otherwise sound coating. Determine which material cracked first.
A Practical Investigation Procedure
- Preserve the evidence. Photograph the overall area and close details with scale, normal light, and low-angle light before cleaning or scraping.
- Map the distribution. Compare sun and shade, hot and cool areas, elevations, joints, edges, repairs, production batches, substrate types, and service zones.
- Describe the morphology. Record crack width, length, spacing, direction, density, depth, edge condition, and whether pieces remain firmly attached.
- Identify the affected layer. Use magnification, careful cuts, retained chips, or a qualified cross-section to determine whether the topcoat alone or the complete system fractured.
- Measure thickness. Document individual layers where possible and total dry-film thickness. Compare defective and sound areas with the specification and product data sheets.
- Evaluate adhesion and substrate condition. Check for corrosion, moisture, salts, weak concrete, wood movement, flexible joints, old paint, and intercoat separation. Use destructive tests only under an approved plan.
- Reconstruct application history. Review products, batches, mix ratio, thinner, pot life, wet film, flash, recoat intervals, temperatures, humidity, dew point, airflow, bake schedule, and cure records.
- Review service exposure. Consider UV, heat, cold, immersion, chemicals, cleaning, pressure washing, impact, vibration, forming, and structural movement.
- Compare retained samples or sound controls. Laboratory microscopy, spectroscopy, thermal analysis, or flexibility testing may be needed for high-value or safety-critical failures.
Useful Evaluation Standards
- ASTM D660 — Standard Test Method for Evaluating Degree of Checking of Exterior Paints. It provides a visual method for rating checking within its stated scope.
- ASTM D661 — Standard Test Method for Evaluating Degree of Cracking of Exterior Paints. It addresses visible cracking by reference standards.
- ISO 4628-4:2016 — Assessment of degree of cracking, including quantity and size of defects.
- ASTM D7091 — Nondestructive Measurement of Dry Film Thickness of Nonmagnetic Coatings Applied to Ferrous Metals and Nonmagnetic, Nonconductive Coatings Applied to Non-Ferrous Metals.
These methods help describe visible condition or obtain measurements; they do not identify root cause by themselves. Use the edition and acceptance criteria required by the governing specification, and document lighting, magnification, instrument, substrate, and sampling location.
Correcting the Failure
A cosmetic topcoat cannot restore the integrity of a cracked foundation. First determine whether the fissures are shallow and stable or extend into brittle, poorly bonded, contaminated, uncured, corroding, or moving layers. Correct the moisture source, movement, corrosion, incompatibility, excessive build, cure problem, or service condition before refinishing.
Remove defective coating to a sound, firmly attached boundary using an approved method. If limited surface checking can be repaired under the coating manufacturer’s written procedure, clean and prepare the surface, feather sound edges, and confirm compatibility with a test area. Deep or widespread cracking generally requires removal of the affected system and rebuilding to the specified layer thicknesses.
Cracks originating in concrete, wood, seams, joints, fillers, composites, or structural components must be repaired or detailed appropriately; simply bridging active movement with a rigid paint invites recurrence. Critical linings, immersion systems, aircraft, transportation equipment, floors, roofs, tanks, pipelines, and corrosion-control systems require an engineered repair procedure and verification inspection.
Preventing Checking and Cracking
- Select a compatible system with the flexibility, UV resistance, chemical resistance, temperature capability, and durability required for the substrate and service.
- Remove weak, brittle, contaminated, chalked, corroded, or incompatible material before recoating.
- Control wet and dry film thickness for every coat and the total system.
- Follow specified mix ratio, induction time, thinner, pot life, flash, recoat, and cure requirements.
- Apply only within the manufacturer’s temperature, humidity, surface-temperature, and dew-point limits.
- Do not force the surface to cure much faster than the body of the film unless the written process requires it.
- Respect recoat windows and properly abrade or prepare aged, glossy, or fully cured coatings.
- Use flexible detailing at active joints and accommodate substrate movement rather than attempting to hide it with additional film build.
- Inspect high-stress areas, edges, seams, repairs, and exposed elevations before fine checking grows into open cracks.
- Keep application and inspection records so a pattern can be connected to a batch, shift, environment, or service event.
Application-Specific Clues
Architectural and wood coatings: UV aging, accumulated paint layers, moisture cycling, grain movement, and coating a flexible or damp substrate with a rigid film are frequent contributors. Assess older coatings for lead or other hazards before disturbance.
Protective steel and concrete: Determine whether cracks originate in excessive coating build, thermal cycling, underfilm corrosion, substrate cracks, salts, moisture, or chemical exposure. An open crack can become a direct route to the substrate.
Automotive, OEM, aerospace, rail, and powder coating: Review pretreatment, bake profile, forming after coating, film build, rework layers, filler and primer flexibility, part geometry, vibration, thermal cycling, and chemical service.
Floors, roofs, tanks, and linings: Movement, hydrostatic pressure, immersion, thermal shock, traffic, chemical exposure, and excessive accumulated layers can interact. Determine whether the system remains continuous enough to perform its containment or waterproofing function.
Technical References
- ASTM D660: Evaluating Degree of Checking of Exterior Paints
- ASTM D661: Evaluating Degree of Cracking of Exterior Paints
- ISO 4628-4:2016: Assessment of Degree of Cracking
- Sherwin-Williams: Flaking, Cracking, and Peeling Paint
© 2026 Azimuth Spray Systems, LLC. AirSprayTech.com — The Finishing Authority®. All rights reserved.