AirSprayTech.com Academy — Finish Defect Diagnostic Center
Too Much of a Good Thing: Diagnosing Mud Cracking
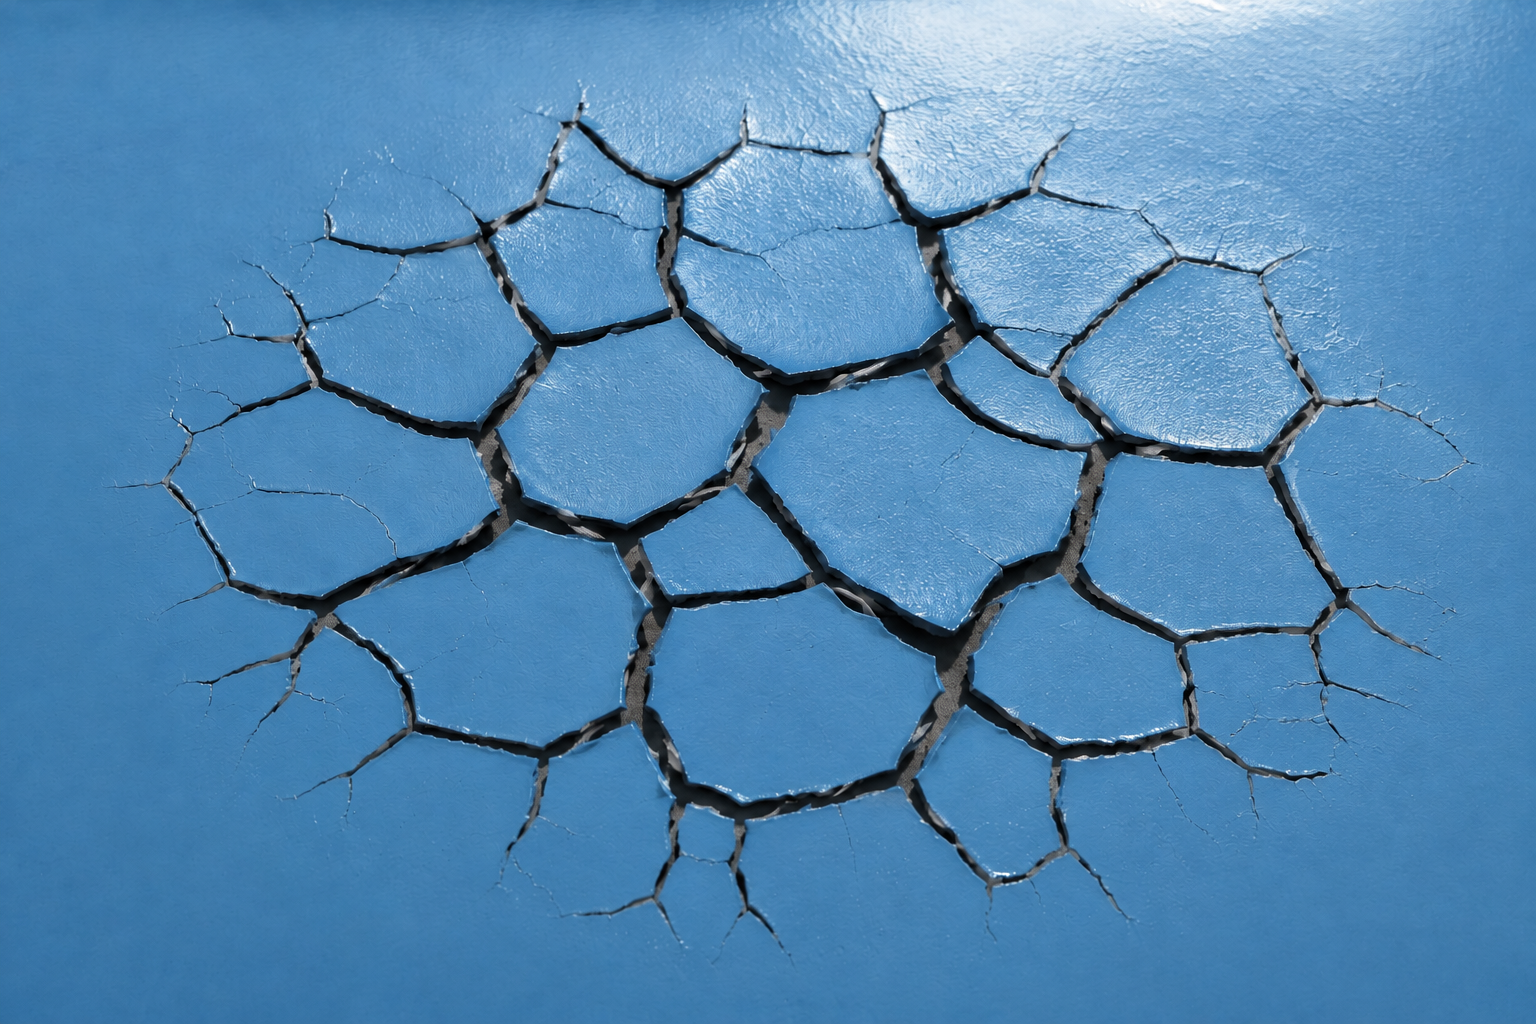
Mud cracking is a network of deep, irregular cracks that divides a dry coating into polygonal islands resembling a dried mud bed. It most often develops when a coating is applied too thickly and then shrinks as water, solvent, or other volatile material leaves—or as the binder cures. Internal stress becomes greater than the film can tolerate, and the coating splits to relieve it.
What Mud Cracking Looks Like
- Deep, irregular cracks forming large polygonal islands.
- Cracks wider and deeper than ordinary hairline checking.
- Failure concentrated in visibly heavy or slow-drying areas.
- Raised, curled, or separated crack edges as the failure progresses.
- Underlying primer or substrate visible through the deepest openings.
Mud cracking may appear during drying, during cure, or after temperature and moisture cycling. In some high-build materials it can develop rapidly; in other systems, initial shrinkage creates small cracks that widen with service. Once cracks interrupt film continuity, they can admit water, chemicals, oxygen, and contamination.
Why Thick Films Crack
A wet coating contains liquid or reactive components that change as the film forms. The surface and deeper portions do not always dry or cure at the same rate. When an overbuilt layer shrinks, the substrate and adjacent coating restrain that movement. Tensile stress accumulates until the film splits. Brittleness, poor adhesion, rapid surface drying, incompatible layers, or substrate movement can reduce the amount of stress the system can withstand.
Common Causes
Excessive Application
- Wet- or dry-film thickness exceeds the product maximum.
- Too many passes, excessive overlap, or slow gun travel.
- Wrong roller nap, heavy brush loading, pooling, or material buildup in corners.
Drying and Cure Imbalance
- The surface dries rapidly while the lower film remains wet.
- Insufficient ventilation, cold substrate, high humidity, or early heat changes solvent or water release.
- Undercoats are recoated before adequate drying or cure.
Material and Mixing
- Incorrect mix ratio, reduction, induction, or component sequence.
- Unapproved thinner or additive changes film formation.
- Material is outside pot life, shelf life, temperature, or viscosity limits.
System and Substrate
- A rigid coating cannot accommodate substrate or underlying-film movement.
- A weak, soft, contaminated, or poorly adhered layer cannot restrain shrinkage.
- Repeated recoating creates excessive total system thickness.
Read the Pattern
| Observed Pattern | Investigate First |
|---|---|
| Cracking is worst in corners and recesses | Pooling, stripe-coat buildup, drainage, brush loading, gun angle, and local DFT. |
| Cracks follow spray overlaps | Overlap percentage, travel speed, pass count, fan uniformity, and wet-film readings. |
| Only one coat cracks | Per-coat thickness, mixing, reducer, flash, and cure of that application. |
| Entire old system shows polygonal cracking | Total coating thickness, aging, repeated maintenance coats, brittleness, and substrate movement. |
| Cracking develops after heating | Pre-bake flash, temperature ramp, actual part temperature, and trapped volatile material. |
| Cracks originate at a soft or weak layer | Undercoat cure, compatibility, contamination, adhesion, and recoat window. |
| Only textured valleys crack | Material accumulation, roller nap, application technique, and local drying conditions. |
Do Not Confuse It with Another Defect
| Condition | Typical Distinction |
|---|---|
| Mud cracking | Deep polygonal cracks commonly associated with overbuild, shrinkage, and internal stress. |
| Checking | Fine, shallow cracks that may not penetrate the full coating thickness. |
| Alligator cracking | A patterned network often associated with aging, brittleness, incompatible layers, or repeated recoating; terminology sometimes overlaps with mud cracking. |
| Wrinkling | The surface puckers or folds over softer material without initially splitting into deep polygonal islands. |
| Crazing | A dense network of very fine surface cracks rather than large separated blocks. |
| Delamination | Coating separates at an interface in sheets or flakes; mud cracks can later promote delamination. |
| Substrate cracking | Concrete, wood, filler, sealant, or another substrate has moved or cracked and the line is reflected through the coating. |
A Practical Investigation
- Preserve the evidence. Photograph the crack network with a scale under normal and low-angle lighting before disturbing it.
- Map the pattern. Note corners, overlaps, low spots, texture, part orientation, rack position, applicator, equipment, batch, and cure zone.
- Establish timing. Determine whether cracks appeared during drying, force cure, cooldown, storage, installation, or service.
- Measure thickness. Record DFT in affected and sound areas where the substrate and method permit. A cross-section can show individual coat thicknesses.
- Determine crack depth. Identify whether cracks stop within one coat, reach an intercoat, or extend to substrate.
- Review application records. Check wet-film readings, pass count, gun setup, roller nap, spread rate, thinning, and material consumption.
- Verify material preparation. Confirm products, batches, mix ratio, induction, pot life, reducer, viscosity, and material temperature.
- Reconstruct drying and cure. Record coat intervals, air movement, humidity, surface temperature, dew point, ventilation, and actual part-temperature profile.
- Evaluate the substrate and layers. Check adhesion, contamination, softness, existing cracks, moisture, and movement.
- Run controlled panels. Apply the system at target and excessive thickness under documented conditions to confirm the suspected relationship.
Testing and Standards
No single field test identifies every cause of mud cracking. Useful evidence includes wet- and dry-film thickness, cross-sections, adhesion and cure testing specified for the system, environmental records, oven profiles, moisture evaluation for porous substrates, and controlled test panels.
ASTM D661 provides a method for evaluating the degree of cracking of exterior paints by comparison with photographic standards. It can help describe crack size and frequency within its scope, but it does not determine the root cause and should not be represented as a universal acceptance method for every industrial, lining, floor, roof, automotive, or powder-coating system.
Correcting Mud Cracking
- Identify the crack depth and correct the application, drying, compatibility, or substrate condition before recoating.
- Remove cracked, loose, excessively thick, soft, or poorly adhered coating to a sound layer. Filling cracks with more paint does not restore continuity.
- Feather sound edges and prepare the exposed surface according to the approved repair specification.
- Prime or seal where required and allow each layer to dry or cure completely.
- Rebuild the system in the specified number of coats, staying within minimum and maximum thickness per coat and total DFT.
- After cure, repeat specified film-thickness, adhesion, holiday, cure, or visual inspections.
Prevention
- Know both the minimum and maximum wet- and dry-film thickness permitted for each coat.
- Use wet-film gauges during application and calibrated DFT equipment after cure where appropriate.
- Build total thickness through the specified number of properly flashed coats.
- Control overlaps, gun speed, fluid delivery, roller loading, brush technique, and stripe-coat buildup.
- Select the correct spray tip, nozzle, roller nap, or application tool for the product and surface texture.
- Mix accurately and observe induction, pot life, viscosity, and material-temperature limits.
- Maintain required surface and air temperature, humidity, ventilation, and recoat intervals.
- Control heat ramp and verify actual part or substrate temperature during force cure.
- Remove unstable existing coatings rather than building indefinitely over them.
- Document high-risk locations such as corners, welds, recesses, texture valleys, and drainage points.
Application Notes
Architectural and maintenance painting: Mud cracking often appears where latex or high-solids paint is applied heavily, accumulates in corners, or covers a poorly prepared surface. Scrape or sand the failed film, prepare and prime as required, then recoat at the labeled spread rate.
Industrial and protective coatings: High-build epoxies, mastics, intumescents, and linings require strict per-coat thickness control. Excessive build can trap solvent and create cure gradients in addition to cracking.
Floors, roofs, and concrete coatings: Low spots, texture valleys, cracks, penetrations, and roller ridges collect material. Substrate moisture or movement may create a similar pattern and must be investigated.
Powder coating: True dried-mud cracking terminology is more common with liquid or waterborne films. Powder may show cracking from excessive film, incompatible powder, poor melt flow, contamination, substrate movement, or cure conditions; investigate the powder-specific mechanism.
What to Document
Record photographs with scale, crack size and frequency, affected locations, crack depth, individual and total coating thickness, substrate and existing system, preparation, application method and equipment, material and batch numbers, mixing, spread rate, wet-film readings, flash and cure history, environmental conditions, adhesion or cure results, corrective action, and verification. Separate confirmed facts from suspected causes.
Technical References
- Sherwin-Williams: How to Fix Paint Mudcracking
- Sherwin-Williams Pro Industrial: Mudcracking
- ASTM D661: Evaluating Degree of Cracking of Exterior Paints
Technical notice: This article provides general educational guidance. Follow the coating manufacturer's current product data sheet, safety data sheet, approved repair procedure, project specification, and applicable safety and environmental requirements.
Return to the Finish Defect Diagnostic Center
© 2026 Azimuth Spray Systems, LLC. AirSprayTech.com — The Finishing Authority®. All rights reserved.