 AirSprayTech.com Academy
The Finish That Traveled: Diagnosing Paint Overspray
Finish Defect Diagnostic Center
Overspray consists of atomized coating particles that land on a surface outside the intended wet spray area. The particles may remain as loose dry dust, adhere as a rough granular deposit, partially dissolve into a still-tacky finish, or become permanently embedded. Overspray can damage the coated product, nearby equipment, vehicles, buildings, windows, floors, vegetation, or property beyond the work area.
What Overspray Looks and Feels Like
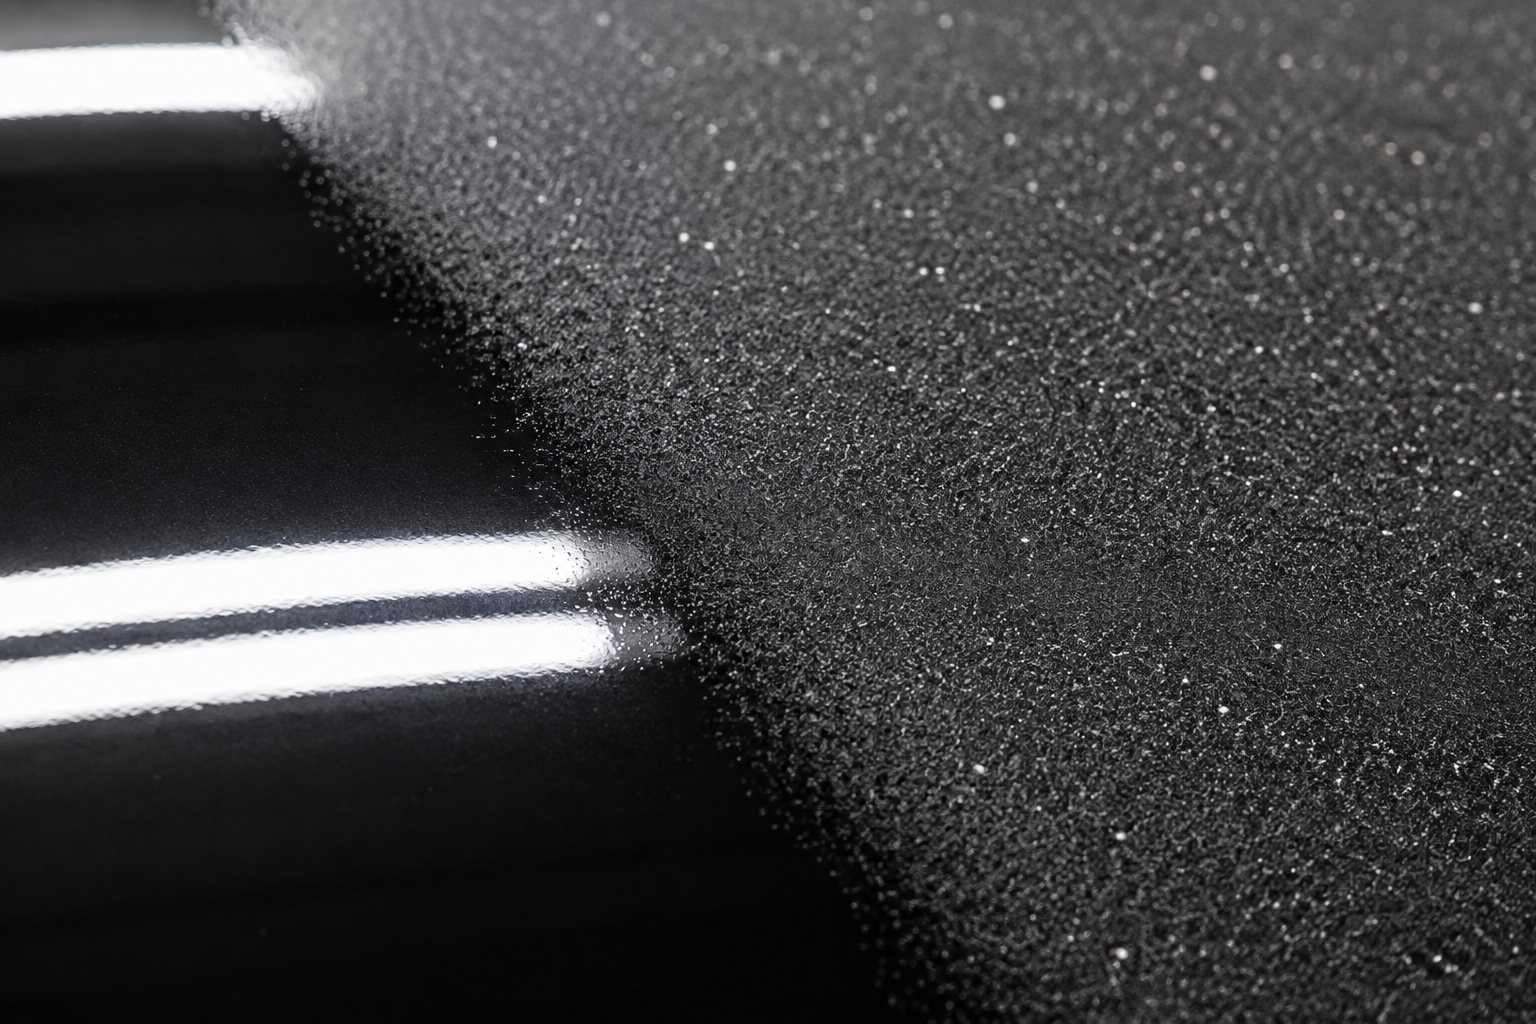
- Fine granular particles sitting on or embedded in a finish.
- A rough surface that may feel like very fine sandpaper.
- Haze, reduced gloss, color shift, or a dusty appearance.
- A sharp boundary or shadow where masking, geometry, or another object blocked fallout.
- A gradual decrease in particle density away from the suspected source.
The condition depends on how wet the particles are when they land. Wet overspray may merge into a tacky coating and permanently alter texture or color. Drier particles may adhere weakly and sometimes be removed without damaging the underlying finish. Never assume removal will be simple until the coating, substrate, age, and extent are known.
Overspray Versus Dry Spray
Dry spray normally describes coating intended for the workpiece that dries too much in flight and fails to flow into the applied film. Overspray describes spray particles deposited outside their intended target or spray zone. The same atomized cloud can produce both: dry spray near an edge of the work and overspray on an adjacent surface.
Common Causes
Masking and Containment
- Incomplete masking, unsealed edges, gaps, or porous covering.
- Adjacent parts, equipment, floors, or openings left unprotected.
- Spraying outside an adequately enclosed or controlled area.
Gun Setup and Technique
- Excessive atomizing pressure or unnecessarily high airless pressure.
- Gun too far from the work, poor angle, excessive fan width, or triggering off the part.
- Wrong tip, nozzle, air cap, or electrostatic settings.
Ventilation and Airflow
- Insufficient extraction allows the spray cloud to recirculate.
- Excessive, turbulent, or unbalanced airflow carries particles across finished work.
- Loaded filters, open booth doors, cross drafts, or poorly positioned make-up air.
Material and Conditions
- Reducer too fast, material too viscous, or droplets too fine.
- High temperature, low humidity, long spray distance, or strong wind accelerates drying.
- Part sequence allows later spraying to settle on an earlier tacky finish.
Read the Pattern
| Observed Pattern | Investigate First |
|---|---|
| Deposit follows a masking edge | Mask seal, covering material, tape adhesion, fold direction, and spray angle. |
| One side of many parts is rough | Booth airflow, part spacing, spray sequence, gun direction, and recirculation. |
| Only nearby vehicles or property are affected | Outdoor wind, enclosure, distance, work timing, coating color, and particle transport. |
| Fine haze covers the booth interior | Extraction rate, filter loading, booth balance, transfer efficiency, and atomization. |
| Particles are embedded only in tacky areas | Spray sequence, flash time, part movement, adjacent work, and dust-free time. |
| Overspray is worst around edges and openings | Gun angle, excessive wrap, electrostatic voltage/current settings, shielding, and airflow. |
| Coarse spits accompany fine deposits | Gun cleanliness, loose nozzle, pulsation, condensation, material buildup, and triggering. |
Do Not Confuse It with Another Defect
| Condition | Typical Distinction |
|---|---|
| Overspray | Unintended airborne coating particles land on another surface, often with a directional or shielding pattern. |
| Dry spray | The intended coating droplets arrive too dry and fail to merge into the wet film. |
| Dust and dirt inclusions | Foreign environmental or process particles are embedded; they may not match the coating chemistry or color. |
| Orange peel | A repeating pebbled texture formed by poor flow and leveling rather than particles deposited from another spray zone. |
| Powder contamination | Loose or fused powder may come from color carryover, reclaim, booth leakage, or another powder process. |
| Industrial fallout | Airborne dust, soot, minerals, metal particles, or other emissions—not necessarily paint—settle on a surface. |
A Practical Investigation
- Protect the evidence. Do not wash, polish, clay, solvent-wipe, or scrape the first representative surface. Photograph it with scale and retain samples when appropriate.
- Establish timing. Determine the last known clean condition and compare it with spray operations, shifts, weather, ventilation changes, and maintenance.
- Map the distribution. Record distance, direction, elevation, shielding, indoor airflow, outdoor wind, and deposit density.
- Inspect under magnification. Note particle color, shape, size, gloss, and whether particles are loose, adhered, or embedded.
- Compare candidate coatings. Compare controlled samples from suspected products, but do not declare a match based only on visible color.
- Review spray conditions. Document gun type, tip/nozzle, pressures, distance, fan, flow, transfer efficiency, electrostatic settings, masking, enclosure, extraction, and filter condition.
- Review environmental data. For outdoor work, document wind speed and direction at the actual work location, temperature, humidity, containment, and changing conditions.
- Use laboratory analysis when warranted. Microscopy, infrared spectroscopy, elemental analysis, or other methods may help compare an unknown deposit with candidate materials.
- Confirm the correction. Conduct a controlled production trial and inspect both the workpiece and surrounding witness surfaces.
Testing and Standards
There is no single universal field test that proves the source of every overspray deposit. Evidence may include distribution mapping, witness panels, microscopy, chemical comparison, process records, and meteorological data. Preserve an appropriate chain of custody when property damage, contractual responsibility, or insurance may be involved.
ASTM D7868 addresses determination of the dry-fall properties of protective coatings. Dry-fall material is formulated so airborne particles become dry enough to be removed after falling a specified distance. The practice does not mean all overspray is harmless, does not replace containment, and does not establish the source of an unknown deposit.
Removing Overspray Safely
- Identify the deposited coating and the receiving surface before choosing a removal method.
- Allow the underlying finish to cure as required unless immediate action is specifically authorized.
- Test the least aggressive approved method in a small inconspicuous area.
- For lightly adhered deposits on a polishable finish, the manufacturer may permit washing, specialized surface treatment, fine abrasion, compounding, or polishing.
- Embedded, chemically resistant, textured, matte, soft, porous, plastic, glass, or sensitive surfaces may require a specialist.
- If removal changes gloss, texture, thickness, color, adhesion, or performance, refinishing or replacement may be necessary.
Prevention
- Use a properly designed spray booth, enclosure, or project-specific containment system.
- Mask completely, seal edges, and protect adjacent surfaces and openings.
- Maintain booth balance, extraction, make-up air, filters, doors, seals, and exhaust components.
- Use the lowest pressure that provides correct atomization and pattern quality.
- Keep the gun perpendicular, at the recommended distance, and triggered only across the intended target.
- Select tip/nozzle, fan width, fluid delivery, reducer, and electrostatic settings for the part and coating.
- Plan part spacing and spray sequence so later operations cannot settle onto tacky finishes.
- For outdoor work, establish wind and weather stop limits, containment, exclusion zones, and monitoring before spraying.
- Use witness panels around critical boundaries and inspect during—not only after—the job.
- Train personnel to recognize changes in exhaust performance, visible spray cloud, filter loading, wind, and particle travel.
Application Notes
Automotive refinish and product finishing: masking, booth airflow, part sequence, pressure, and gun distance are common controls. Overspray on metallic or matte finishes may be impossible to polish without changing appearance.
Industrial and protective coatings: overspray can contaminate equipment, instruments, moving parts, fireproofing, labels, adjacent coatings, and surfaces awaiting another coat. Dry-fall products still require verification of fall distance and removability.
Field painting, roofs, bridges, tanks, and structures: wind can transport droplets beyond the visible work zone. Containment, forecasts, real-time measurement, property protection, and shutdown criteria belong in the work plan.
Powder coating: powder overspray is expected inside a contained recovery system but becomes a defect when it contaminates another color, part, booth, oven, or surrounding area. Grounding, booth balance, recovery, color-change cleaning, reclaim, and transfer efficiency are key.
What to Document
Record photographs and samples, affected surfaces, deposit gradient and boundaries, last known clean time, coating products and colors, spray equipment and settings, masking and containment, booth pressure and filter condition, application sequence, wind and weather, witness-panel results, laboratory comparisons, removal trials, damage assessment, corrective action, and verification. Separate measurements and observations from conclusions about source.
Technical References
- PPG Automotive Refinish: Overspray
- Sherwin-Williams: Liquid Coatings Troubleshooting Guide
- Axalta: Paint Defects Manual
- ASTM D7868: Determining Dry-Fall Properties of Protective Coatings
Technical notice: This article provides general educational guidance. Follow the coating manufacturer's current product data sheet, safety data sheet, approved repair procedure, project specification, regulations, and applicable safety and environmental requirements.
Return to the Finish Defect Diagnostic Center
© 2026 Azimuth Spray Systems, LLC. AirSprayTech.com — The Finishing Authority®. All rights reserved.